4Crawlin Build Thread
Nice to hear the steering better than expected. You really got me going with leaves now. Be miles ahead of what we have for travel when lifted w the stock setup.
they've always worked for me.
-

HARDTRAILZ - Moderator
- Posts: 6342
- Joined: Sat Sep 12, 2009 1:49 am
- Location: IN, Batesville
- Name: Kyle
- Vehicle Year: 2006
- Vehicle: Chevrolet TrailBlazer
- DriveTrain: 4WD w/ Aftermarket Locker
- Rank: Extreme Offroader
Looking awesome!!.. How much further back did your dual setup move the rear yoke?
-

OregTrailBlazin - Off-Road Vendor
- Posts: 610
- Joined: Wed Sep 09, 2009 2:34 pm
- Location: OR, Grants Pass
- Name: Johnathan Kurz
- Vehicle Year: 2004
- Vehicle: Chevrolet TrailBlazer
- DriveTrain: 4WD
I don't really know, I never measured. But I did swap from a slip to a fixed yoke at the same time. Ill try to get a measurement.
-

chevycrew - Veteran
- Posts: 1088
- Joined: Tue Mar 08, 2011 2:42 pm
- Location: UT, Salt Lake City
- Name: Steve
- Vehicle Year: 2002
- Vehicle: Chevrolet TrailBlazer
- DriveTrain: 4WD
- Rank: Trail Ready
Cooling system is done, sans one upper radiator bracket that I need to fab.
Now that thats complete, back to the suspension work.
Oh yeah, exhaust cut off after the cat sounds like a pissed bumble bee!
Now that thats complete, back to the suspension work.
Oh yeah, exhaust cut off after the cat sounds like a pissed bumble bee!
-
chevycrew - Veteran
- Posts: 1088
- Joined: Tue Mar 08, 2011 2:42 pm
- Location: UT, Salt Lake City
- Name: Steve
- Vehicle Year: 2002
- Vehicle: Chevrolet TrailBlazer
- DriveTrain: 4WD
- Rank: Trail Ready
Yay! Spring perches showed up. Bushings for the springs should be here later today, Along with the dana 60 u-bolt plates and u-bolts for the front.

-
chevycrew - Veteran
- Posts: 1088
- Joined: Tue Mar 08, 2011 2:42 pm
- Location: UT, Salt Lake City
- Name: Steve
- Vehicle Year: 2002
- Vehicle: Chevrolet TrailBlazer
- DriveTrain: 4WD
- Rank: Trail Ready
Awesome!
- bartonmd
- Moderator
- Posts: 4469
- Joined: Wed Sep 09, 2009 9:35 am
- Location: IN, Indianapolis
- Name: Mike
- Vehicle Year: 2007
- Vehicle: Chevrolet TrailBlazer
- DriveTrain: 4WD w/ G80
- Rank: Offroad Rated
The name of this thread should just be changed to "Not fu*king around" --cause you sir, are not.
Pulling this together
Pulling this together
- bdp1978
- Trail-Blazer
- Posts: 253
- Joined: Fri Oct 22, 2010 12:32 pm
- Location: Rochester Hills, Mi
- Name: Brad
- Vehicle Year: 2004
- Vehicle: Chevrolet TrailBlazer
- DriveTrain: 4WD w/ G80
Playing around with tire fitment.
In the picture, the oil pan is still roughly 1" below the center of the wheel!
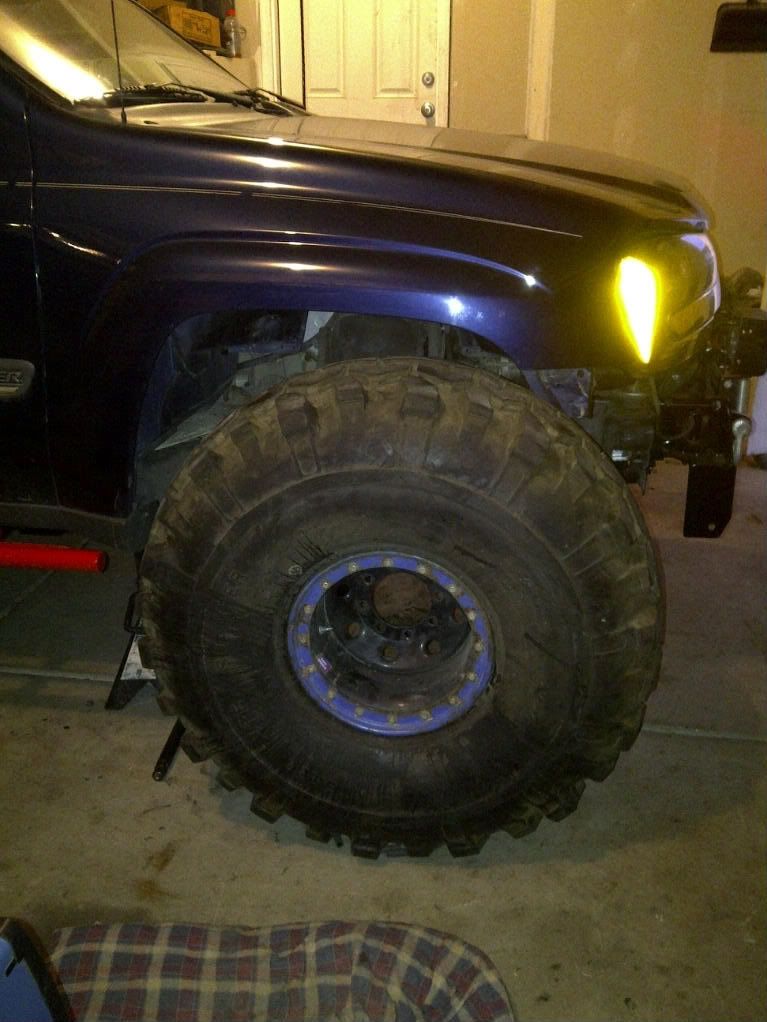
In the picture, the oil pan is still roughly 1" below the center of the wheel!
-
chevycrew - Veteran
- Posts: 1088
- Joined: Tue Mar 08, 2011 2:42 pm
- Location: UT, Salt Lake City
- Name: Steve
- Vehicle Year: 2002
- Vehicle: Chevrolet TrailBlazer
- DriveTrain: 4WD
- Rank: Trail Ready
arnt you done yet... its been almost a month now... 
-

Hatchet669 - Trail-Blazer
- Posts: 257
- Joined: Wed Sep 30, 2009 8:23 pm
- Location: IL, Worth
- Name: Joe
- Vehicle Year: 2003
- Vehicle: Chevrolet TrailBlazer
- DriveTrain: 4WD
- Rank: Trail Ready
chevycrew wrote:
Looks like you might have some rubbing under compression... LOL
Mario - Build Thread
-

Gordinho80 - Lifer
- Posts: 2787
- Joined: Tue Sep 08, 2009 9:27 am
- Location: NJ, Jackson
- Name: Mario Almeida
- Vehicle Year: Other
- Vehicle: Other Vehicle
- DriveTrain: 4WD
Yeah just a little rubbing!
Got the strut towers, subframe, and sway bar brackets cut off. Careful work with a 8" sawzall blade made it fairly simple.
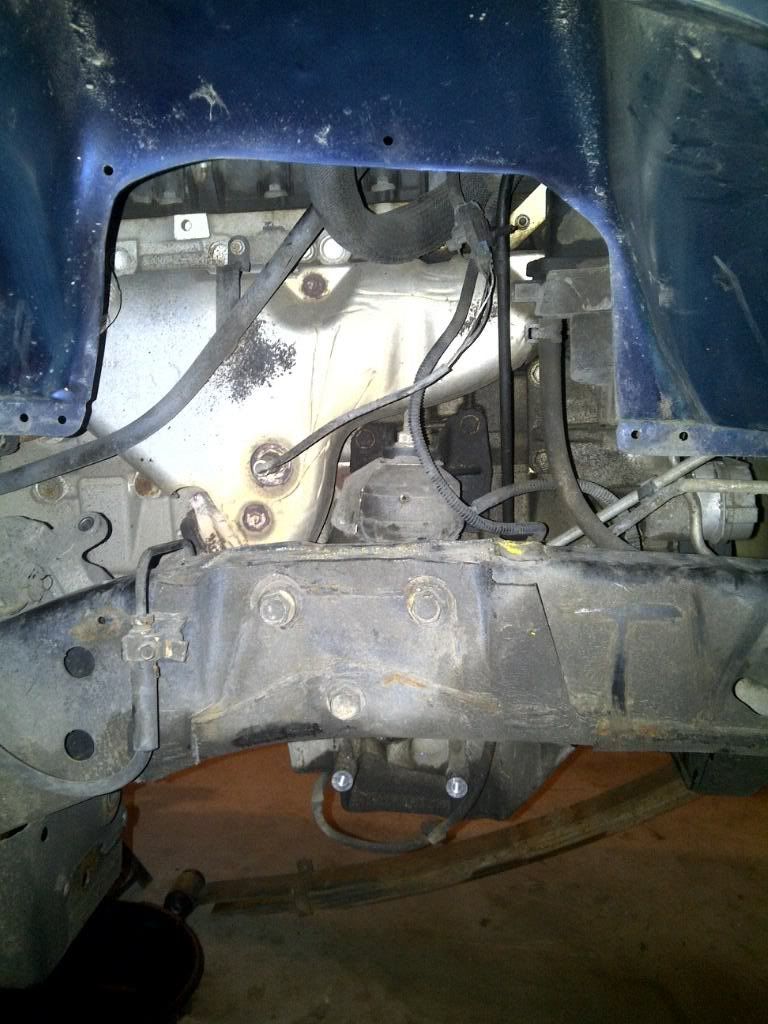
Got the strut towers, subframe, and sway bar brackets cut off. Careful work with a 8" sawzall blade made it fairly simple.
-
chevycrew - Veteran
- Posts: 1088
- Joined: Tue Mar 08, 2011 2:42 pm
- Location: UT, Salt Lake City
- Name: Steve
- Vehicle Year: 2002
- Vehicle: Chevrolet TrailBlazer
- DriveTrain: 4WD
- Rank: Trail Ready
and there it is... the "no going back now" point of chopping off the front subrame!
Mike
Mike
- bartonmd
- Moderator
- Posts: 4469
- Joined: Wed Sep 09, 2009 9:35 am
- Location: IN, Indianapolis
- Name: Mike
- Vehicle Year: 2007
- Vehicle: Chevrolet TrailBlazer
- DriveTrain: 4WD w/ G80
- Rank: Offroad Rated
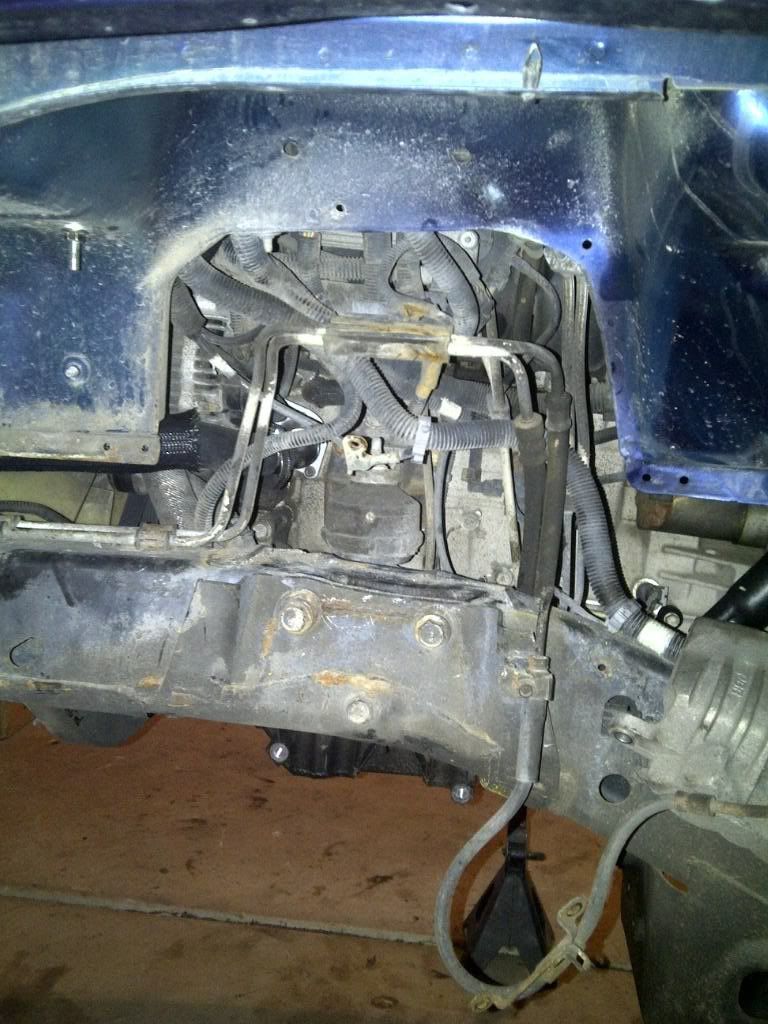
really opened up that area! looks like it will be easier to get at things to work on now also.
-
dirty anton - Trail-Blazer
- Posts: 426
- Joined: Thu Aug 19, 2010 12:21 am
- Location: upper marlboro md
- Name: mike
- Vehicle Year: 2002
- Vehicle: Chevrolet TrailBlazer
- DriveTrain: 4WD w/ Aftermarket Locker
- Rank: Extreme Offroader
Can't wait to see what you're going to do with the oil pan. 
-

Trail X - Founder
- Posts: 9925
- Joined: Mon Sep 07, 2009 10:22 pm
- Location: VA, Roanoke
- Name: James Downing
- Vehicle Year: 2005
- Vehicle: Chevrolet TrailBlazer
- DriveTrain: 4WD w/ Aftermarket Locker
- Rank: Expedition Guide
Oooooo. How easy to change the motor mount and O2 sensor! 
-

The Roadie - Founder
- Posts: 5013
- Joined: Mon Sep 07, 2009 11:29 pm
- Location: OR, Portland area
- Name: Bill Carton
- Vehicle Year: 2004
- Vehicle: GMC Envoy
- DriveTrain: 4WD w/ G80
- Rank: Expedition Guide
Dont forget the thermostat too, no pulling the alternator!
I should have cut the crap off before i changed it...
I should have cut the crap off before i changed it...
-
chevycrew - Veteran
- Posts: 1088
- Joined: Tue Mar 08, 2011 2:42 pm
- Location: UT, Salt Lake City
- Name: Steve
- Vehicle Year: 2002
- Vehicle: Chevrolet TrailBlazer
- DriveTrain: 4WD
- Rank: Trail Ready
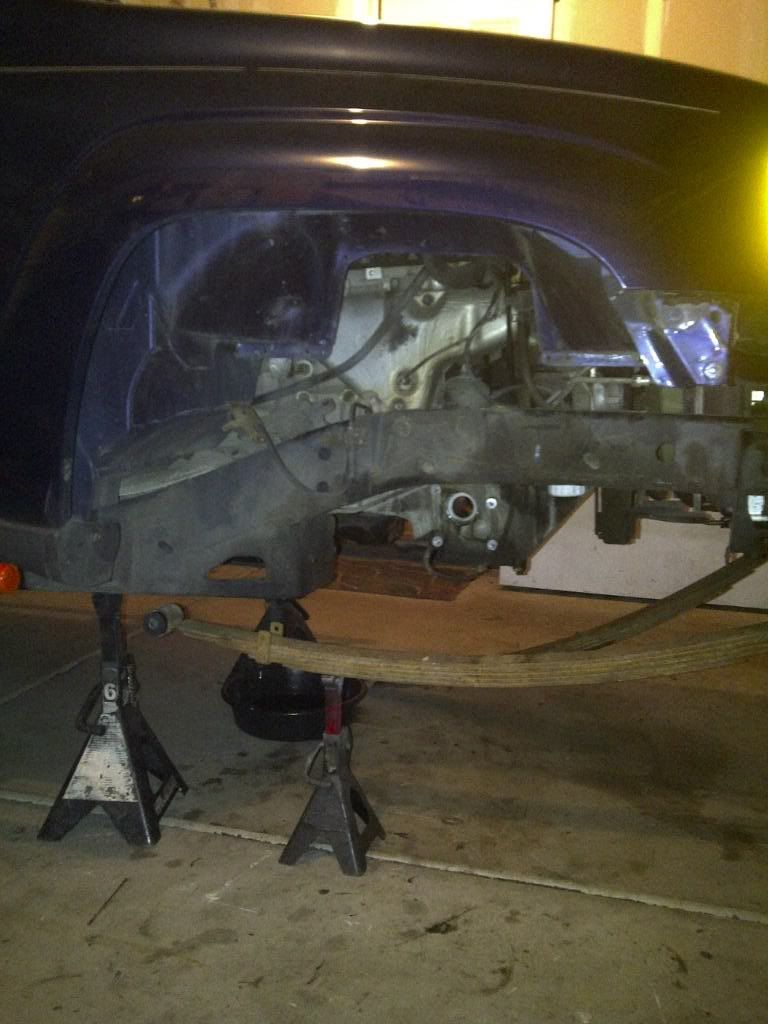
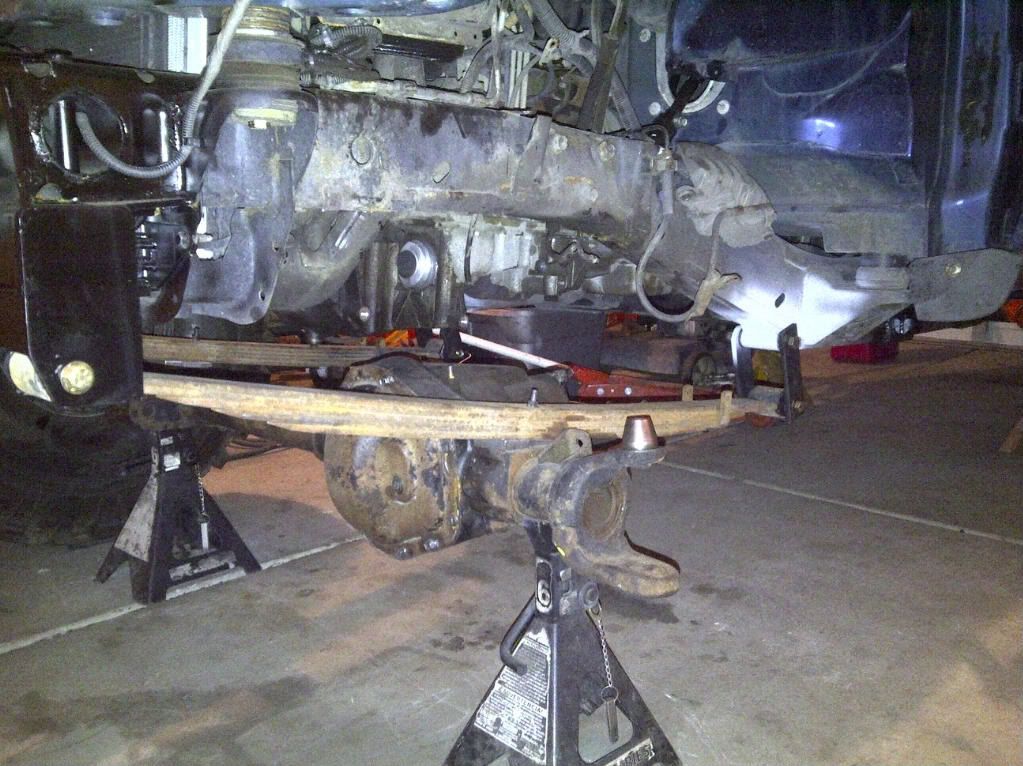
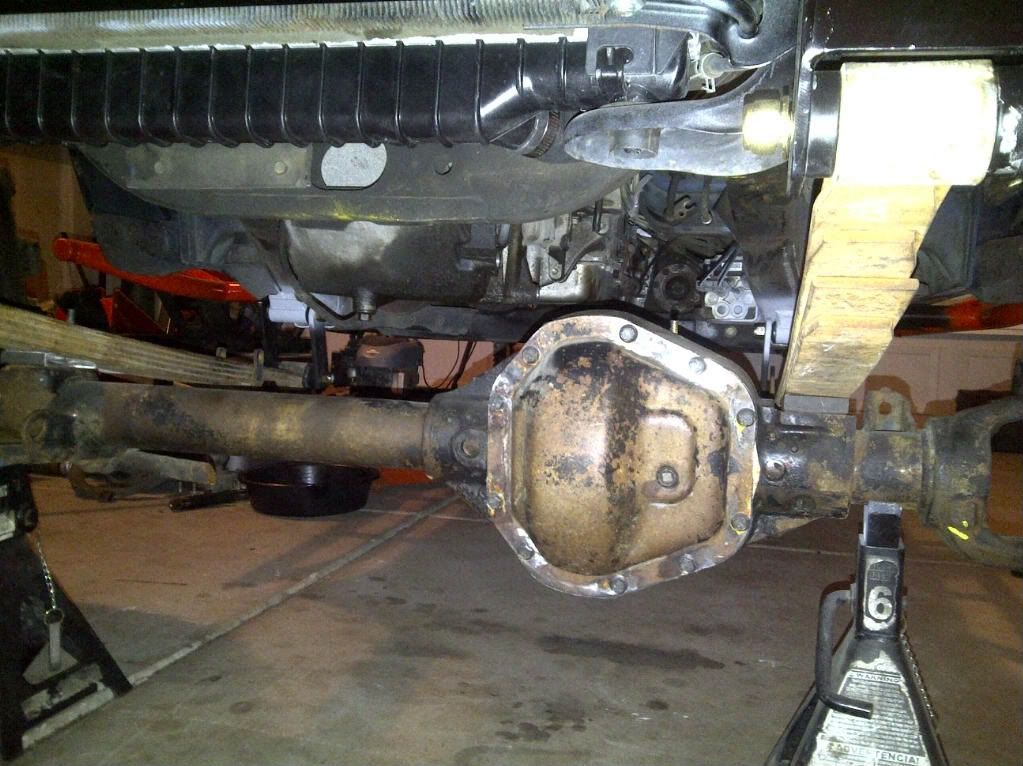
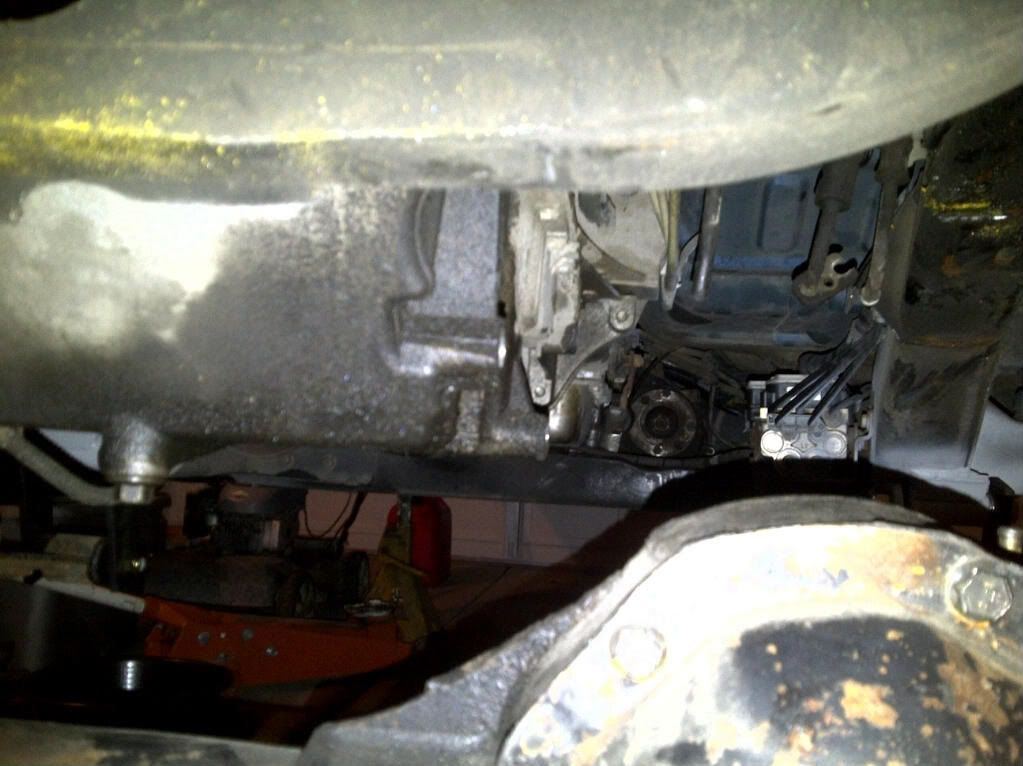
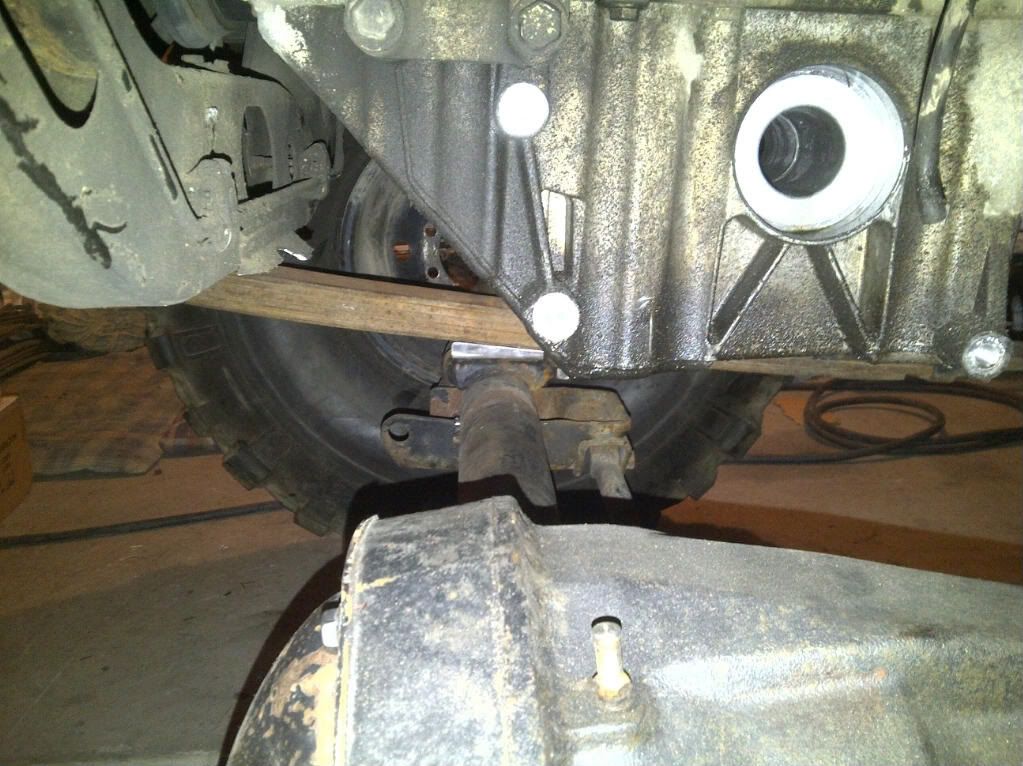
Here is the suspension setup for the front. With careful bumpstop placement, no pan mods!
-
chevycrew - Veteran
- Posts: 1088
- Joined: Tue Mar 08, 2011 2:42 pm
- Location: UT, Salt Lake City
- Name: Steve
- Vehicle Year: 2002
- Vehicle: Chevrolet TrailBlazer
- DriveTrain: 4WD
- Rank: Trail Ready
AWESOME!
- bartonmd
- Moderator
- Posts: 4469
- Joined: Wed Sep 09, 2009 9:35 am
- Location: IN, Indianapolis
- Name: Mike
- Vehicle Year: 2007
- Vehicle: Chevrolet TrailBlazer
- DriveTrain: 4WD w/ G80
- Rank: Offroad Rated
Those are stock junkyard springs? No lift. 1/2 ton or 3/4 ton? I have some 3/4 ton stock n couple sizes of lift in the barn I believe.
they've always worked for me.
-
HARDTRAILZ - Moderator
- Posts: 6342
- Joined: Sat Sep 12, 2009 1:49 am
- Location: IN, Batesville
- Name: Kyle
- Vehicle Year: 2006
- Vehicle: Chevrolet TrailBlazer
- DriveTrain: 4WD w/ Aftermarket Locker
- Rank: Extreme Offroader
have you tried putting any weight on that setup? From the pics it looks like if you put some weight on there that the front diff will hit the oilpan.
"Please consider a search before posting. Folks on this site PIONEERED functional offroad use of these trucks."
The answer to many common lift questions can be found here
My Build Thread
The answer to many common lift questions can be found here
My Build Thread
-

navigator - Moderator
- Posts: 4651
- Joined: Wed Mar 09, 2011 10:16 am
- Location: NC, Winnabow
- Name: Chris
- Vehicle Year: 2006
- Vehicle: Chevrolet TrailBlazer
- DriveTrain: 4WD
- Rank: Trail Ready