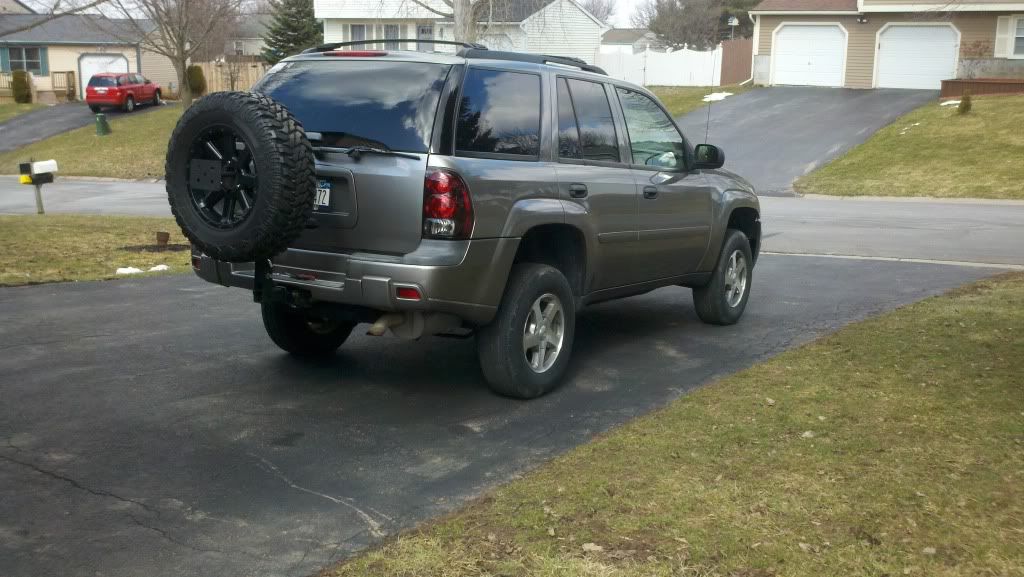
Offroad Trailblazers and Envoys

CBI Offroad Fab. - Rear Spare Carrier

Any special projects involving a decent amount of fab work (bumpers, sliders, roof racks, etc)

by dirtychevymama » Wed Nov 11, 2009 9:44 pm

:wallbash: I totally bypassed this thread! :wallbash: That is sweet!
User avatar
dirtychevymama
Off-Roader
 
Posts: 150
Joined: Thu Sep 10, 2009 10:49 pm
Location: Elkhart, IN
Vehicle Year: 2003
Vehicle: Chevrolet TrailBlazer
DriveTrain: 4WD w/ G80

by Zero » Mon Nov 16, 2009 7:42 pm

i got mine from alekg, i fab'd up my own highlift mount. to be honest, like jd said its not hard to lift up once the carrier has been folded down. and def get that pivoting head thing he has listed above. it makes life much easier. no searching around for that damn pin...hahahaha

although one day i would much prefer to have a swing out gate style carrier so i can mount my fuel, highlift, and tire together.
Zero
Veteran
 
Posts: 1048
Joined: Thu Sep 10, 2009 5:07 pm
Location: Los Angeles, CA / Toronto, ON
Name: Brendan
Vehicle Year: 2005
Vehicle: Chevrolet Trailblazer EXT
DriveTrain: 4WD w/ G80
Rank: Offroad Rated

by foosh » Mon Nov 16, 2009 8:17 pm

http://tiregate.com/hg_series_0.shtml

Heres one... just minus the fuel.
Only White Lifted TB in Jerzey on 33's :safari:

:flex dirty: Pine Barrens Wheelin!
Build Thread http://forums.offroadtb.com/viewtopic.php?f=25&t=113
User avatar
foosh
Addict
 
Posts: 715
Joined: Fri Sep 11, 2009 9:01 pm
Location: Red Bank Area
Vehicle Year: 2004
Vehicle: Chevrolet TrailBlazer
DriveTrain: 4WD
Rank: Offroad Rated

by Zero » Tue Nov 17, 2009 4:10 pm

it saeems like it would stick out really far from the vehicle. i want something nice and tight to the body. ill probably have to replace the whole rear bumper to get what i want.
Zero
Veteran
 
Posts: 1048
Joined: Thu Sep 10, 2009 5:07 pm
Location: Los Angeles, CA / Toronto, ON
Name: Brendan
Vehicle Year: 2005
Vehicle: Chevrolet Trailblazer EXT
DriveTrain: 4WD w/ G80
Rank: Offroad Rated

by The Roadie » Tue Nov 17, 2009 4:14 pm

I had a Hitchgate and it WAS exceedingly far from the body and the tire was higher than it needed to be. So I had Neil cannibalize it and weld the important bits to the Envoy's receiver assembly and tighten up the spacing. Took pics at night when we installed it but they're terrible quality. Need to take them again and post a thread.
User avatar
The Roadie
Founder
 
Posts: 5011
Joined: Mon Sep 07, 2009 11:29 pm
Location: CA, Vista, San Diego County
Name: Bill Carton
Vehicle Year: 2004
Vehicle: GMC Envoy
DriveTrain: 4WD w/ G80
Rank: Expedition Guide

by Cody_S » Fri Mar 16, 2012 5:53 am

JamesDowning wrote:Well I finally got around to legalizing my license plate. I figured some of you may find this useful (Alek?)

Image
I think the new position looks better than before... plus it doesn't get in my way when accessing the rear.


Is this something you put together yourself or was it part of a plate relocation kit? Definitely a good way to mount it, and probably the same route I'll take if I end up going with a hitch mount.
User avatar
Cody_S
Trail-Blazer
 
Posts: 336
Joined: Thu Oct 14, 2010 7:38 pm
Location: Canton, GA
Name: Cody
Vehicle Year: 2006
Vehicle: Chevrolet TrailBlazer
DriveTrain: 4WD
Rank: Offroad Rated

by janesy86 » Fri Mar 16, 2012 7:34 am

Plate relocation kit, for a TB?! Please.

No, A bunch of us have done this for mounting spares on the back. Just get a 1" wide piece of aluminum from Lowes or something, and bend it to match the contours. Drill a few holes, mount a new light and done. I did use Marios idea of a rubber stopper on the back where the end of the extrusion met the body to keep it tight and not scratch.
Build Thread
Back to stock, had fun while it lasted...
janesy86
Veteran
 
Posts: 1291
Joined: Thu Sep 10, 2009 2:29 pm
Location: MA, Salem
Name: Nick Janes
Vehicle Year: 2007
Vehicle: Chevrolet TrailBlazer
DriveTrain: 4WD w/ G80
Rank: Offroad Rated

by Cody_S » Fri Mar 16, 2012 7:42 am

janesy86 wrote:Plate relocation kit, for a TB?! Please.

No, A bunch of us have done this for mounting spares on the back. Just get a 1" wide piece of aluminum from Lowes or something, and bend it to match the contours. Drill a few holes, mount a new light and done. I did use Marios idea of a rubber stopper on the back where the end of the extrusion met the body to keep it tight and not scratch.


Right on, thanks for the tips! :cheers:
User avatar
Cody_S
Trail-Blazer
 
Posts: 336
Joined: Thu Oct 14, 2010 7:38 pm
Location: Canton, GA
Name: Cody
Vehicle Year: 2006
Vehicle: Chevrolet TrailBlazer
DriveTrain: 4WD
Rank: Offroad Rated

by Opeth » Thu Apr 04, 2013 8:50 pm

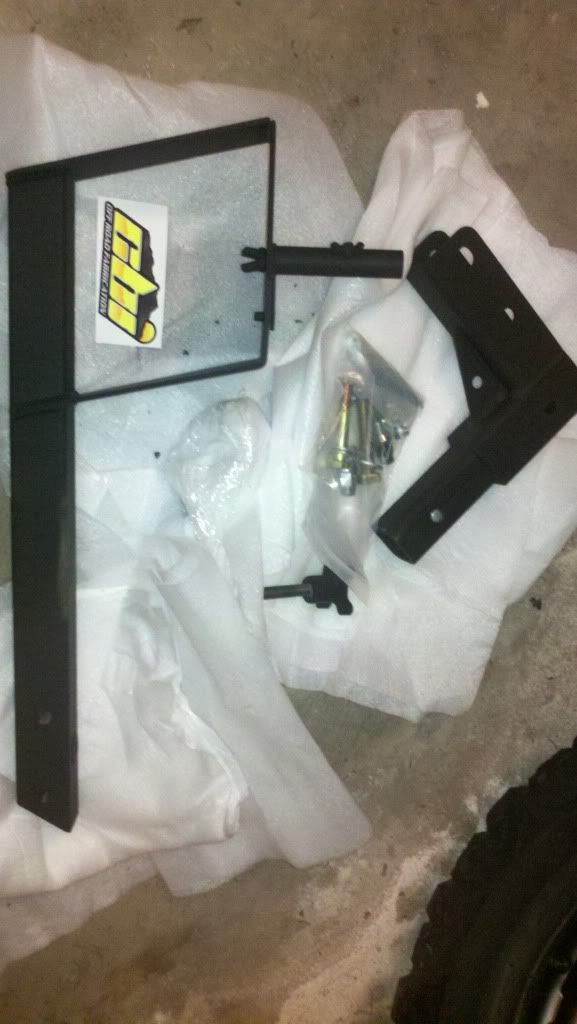
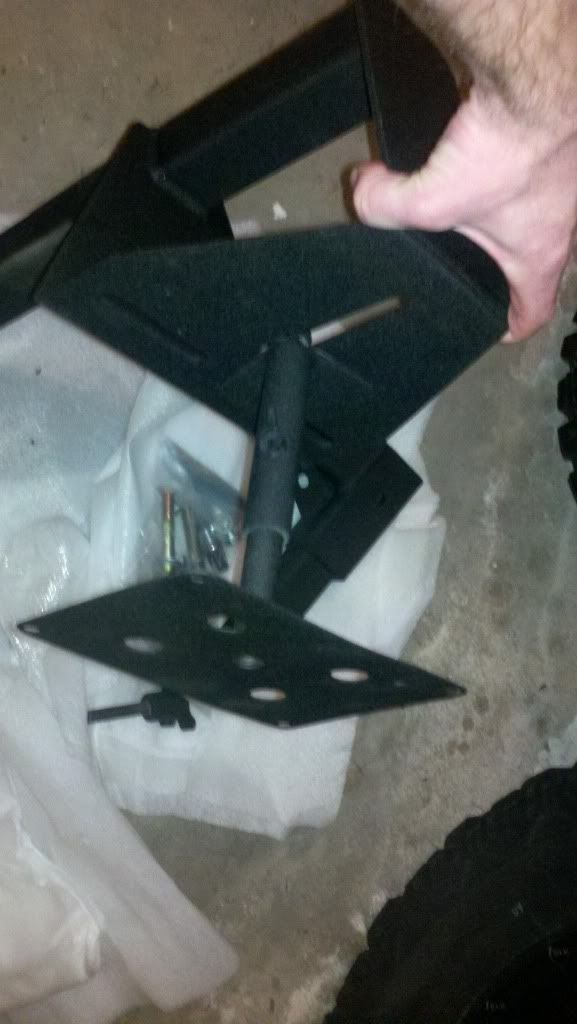
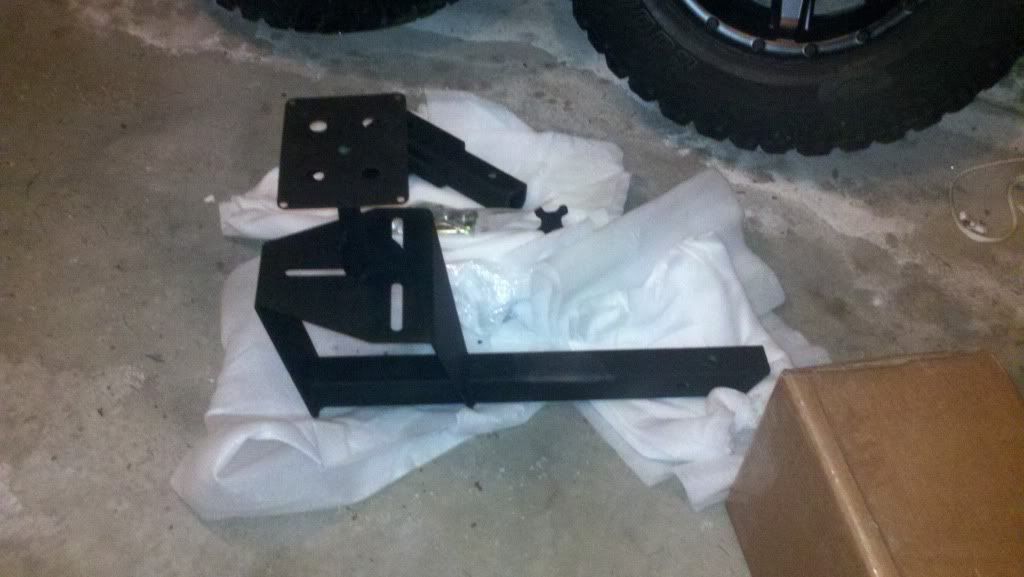
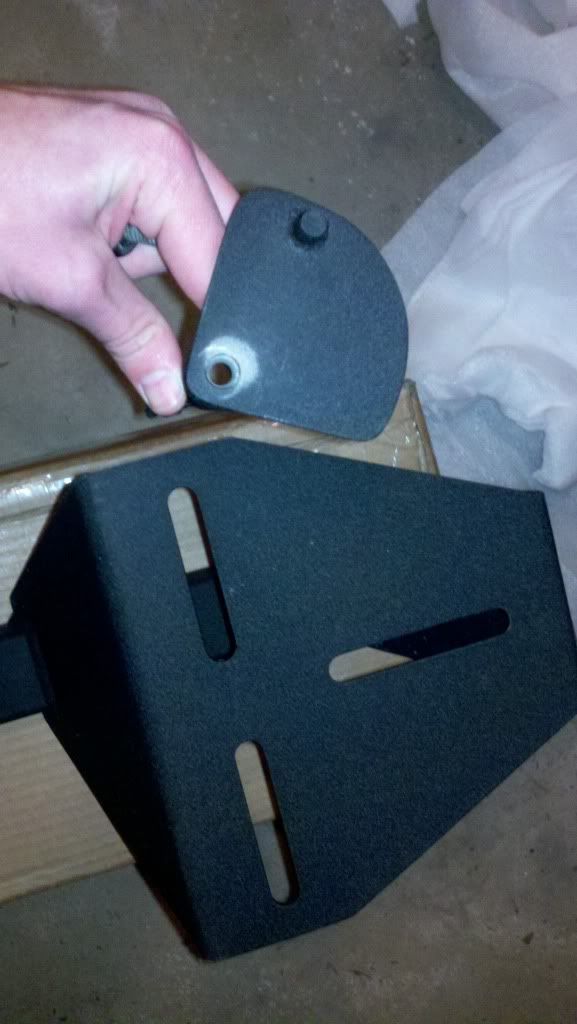
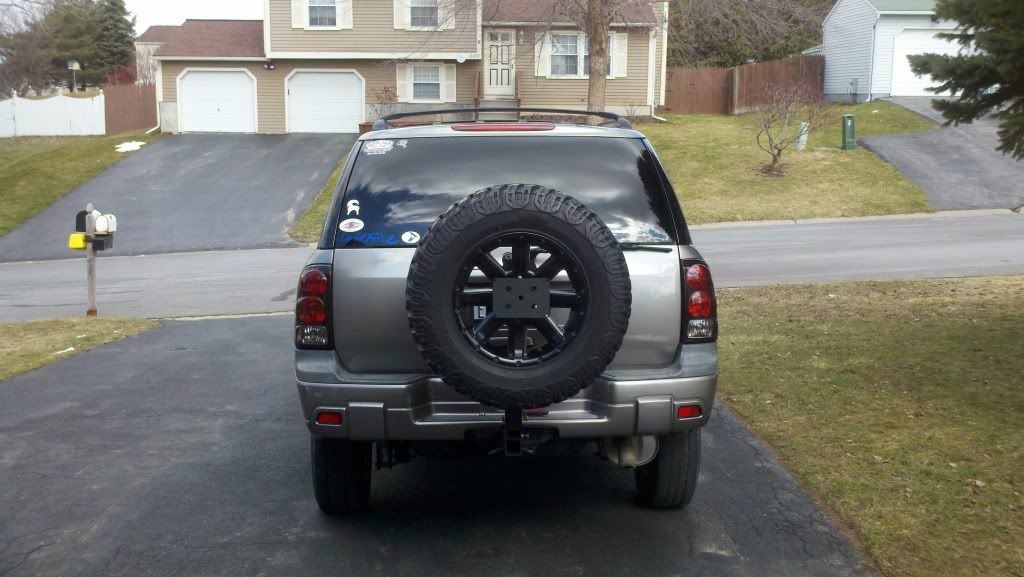
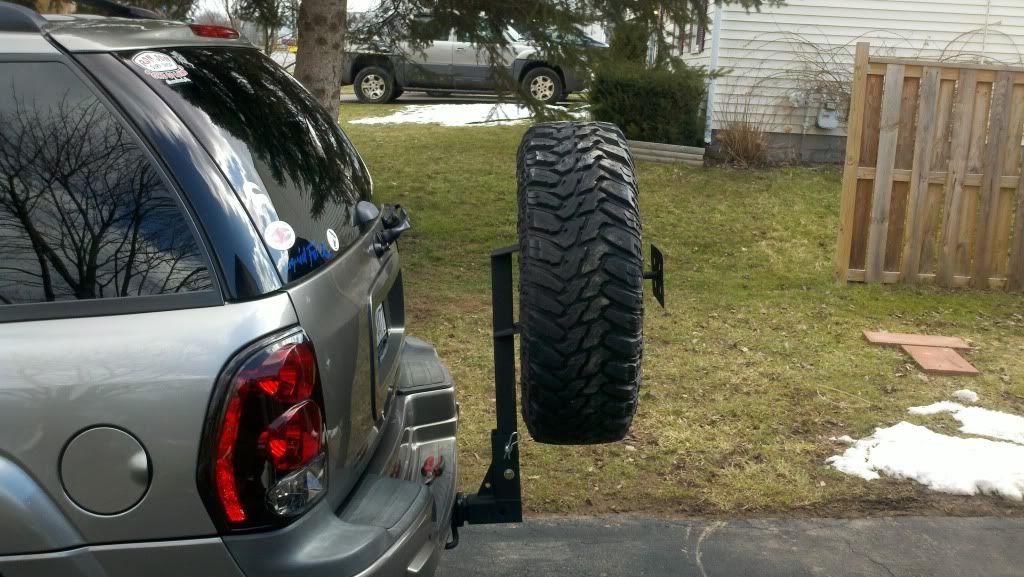
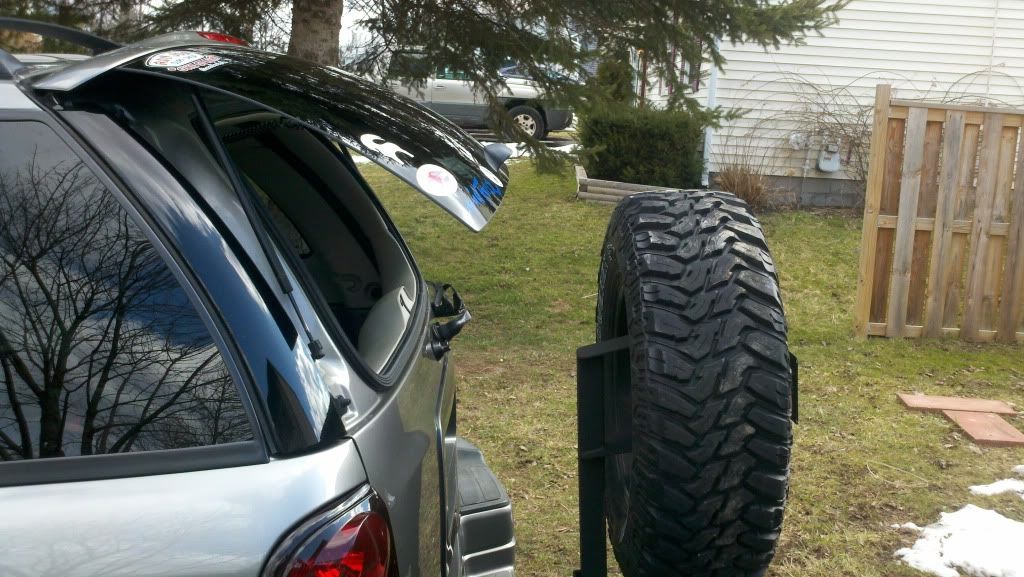
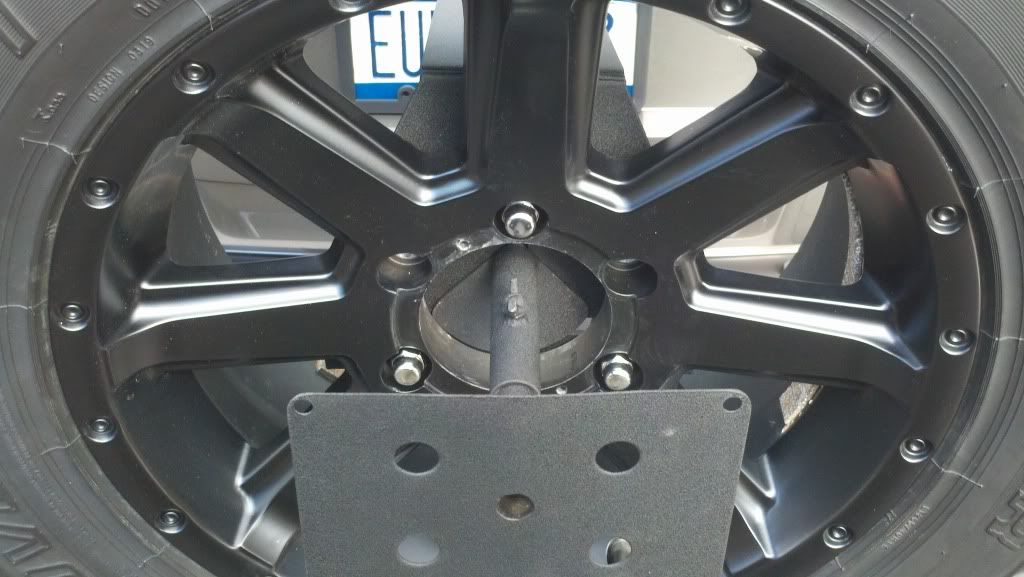
Ok, my turn. I apologize for the crappy pictures but poor lighting in my garage at night and off my cell phone. This is a premium model, couple issues with it right now that I am working with them to get corrected. They couldn't figure out a way to mount the license plate bracket to the upright with all my stipulations I requested, so they made a through hole bracket. Not exactly what I wanted, when I talked to them about it I had a different idea I thought they were going to do. It's not a deal breaker as it will work, but they didn't give me a way to mount a light to it. They are making me another bracket to attach for a light on the plate. Also the powder coating is real nice and thick, but it made the slip joint for the license plate bracket too tight and will need to be completely removed off the tubing. Not a huge issue but will need to be greased to prevent rusting.

Image

Image

Image

Image

These are just preliminary pictures, I have been going non stop with work. Was up in Maine Sunday - Wednesday, 14 hour day yesterday doing local busy work, on site training today and have to run to Indiana tomorrow night through Saturday. Hoping to install it Sunday when I have a day off a long with my other to-do's for the truck. Overall it looks good, but I'll see Sunday
User avatar
Opeth
Addict
 
Posts: 846
Joined: Tue Oct 05, 2010 4:46 pm
Location: NY, Solvay
Name: Cody
Vehicle Year: 2006
Vehicle: Chevrolet TrailBlazer
DriveTrain: 4WD
Rank: Trail Ready

by Trail X » Thu Apr 04, 2013 11:30 pm

Sorry you had some issues. They seemed to be good guys, so I hope they will make it right. Gotta ask, why not get the mount drilled to your mounting pattern? If I recall, they did that for my premium unit. Maybe they have streamlined a bit more since then.

Looking forward to the mounting pictures.
8-) Build Thread | ExPo Build | YouTube Videos
Not all who wander are lost. -Tolkien
User avatar
Trail X
Founder
 
Posts: 9935
Joined: Mon Sep 07, 2009 10:22 pm
Location: VA, Roanoke
Name: James Downing
Vehicle Year: 2005
Vehicle: Chevrolet TrailBlazer
DriveTrain: 4WD w/ Aftermarket Locker
Rank: Expedition Guide

by Opeth » Fri Apr 05, 2013 12:12 am

JamesDowning wrote:Sorry you had some issues. They seemed to be good guys, so I hope they will make it right. Gotta ask, why not get the mount drilled to your mounting pattern? If I recall, they did that for my premium unit. Maybe they have streamlined a bit more since then.

Looking forward to the mounting pictures.


I asked them about the mount and told them my tire size I was running and bolt pattern. They said they used an adjustable mount to get all the different patterns, and allow you to use it on another vehicle.

I understand its hard to fab something for a vehicle they aren't use to and is several states away. I use to work in a fab shop myself and consider these things minor hiccups, its going to function as what I wanted it for so I'm not holding it against them. If I end up not liking how the plate goes through the center of the wheel, I can mount it a different way after seeing how everything goes together.

As for the light, I am just going to use a 7 way round plug to flat 4 with a good length of cable and tap into that for my power and make it plug n play. Similar to the photos on their site.

Edit: well, I seem to have more issue as something just caught my attention. They gave me 12mm x 1.5 lugs and bolts... My wheels take 14mm lugs. 14mm lugs don't go through their pre-drilled holes.
User avatar
Opeth
Addict
 
Posts: 846
Joined: Tue Oct 05, 2010 4:46 pm
Location: NY, Solvay
Name: Cody
Vehicle Year: 2006
Vehicle: Chevrolet TrailBlazer
DriveTrain: 4WD
Rank: Trail Ready

by Trail X » Fri Apr 05, 2013 8:31 am

Opeth wrote:Edit: well, I seem to have more issue as something just caught my attention. They gave me 12mm x 1.5 lugs and bolts... My wheels take 14mm lugs. 14mm lugs don't go through their pre-drilled holes.

I don't see how that's an issue. The stock studs are 12mm... so why wouldn't that work on your tire carrier?
8-) Build Thread | ExPo Build | YouTube Videos
Not all who wander are lost. -Tolkien
User avatar
Trail X
Founder
 
Posts: 9935
Joined: Mon Sep 07, 2009 10:22 pm
Location: VA, Roanoke
Name: James Downing
Vehicle Year: 2005
Vehicle: Chevrolet TrailBlazer
DriveTrain: 4WD w/ Aftermarket Locker
Rank: Expedition Guide

by Opeth » Fri Apr 05, 2013 11:54 am

Well I tweaked a few things and got it to work for a quick install, will fully install it when my new tire arrives next week and can get my tires rotated around. Mark's spacers have 14mm lugs and these fit my rims perfectly with no wiggle room. I had to install the rim to the upright portion of the carrier off the truck because there is a lot of slop with the 12mm lugs. They didn't want to line up and wouldn't sit flush until I tried this method.

Image

Image

Image

Image

Image

....and neither of my tow hitches won't line up with the hole, might have to cut 1/2" off the ends of them to make em fit.
User avatar
Opeth
Addict
 
Posts: 846
Joined: Tue Oct 05, 2010 4:46 pm
Location: NY, Solvay
Name: Cody
Vehicle Year: 2006
Vehicle: Chevrolet TrailBlazer
DriveTrain: 4WD
Rank: Trail Ready

by Trail X » Fri Apr 05, 2013 1:31 pm

The slots will probably get old. I'd tack the bolts in place once you get it where you want it.

And don't worry about the 2mm of slop... the bolts don't carry any shear... the friction that the bolts create between the wheel and the plate are what keeps the wheel from moving around.
8-) Build Thread | ExPo Build | YouTube Videos
Not all who wander are lost. -Tolkien
User avatar
Trail X
Founder
 
Posts: 9935
Joined: Mon Sep 07, 2009 10:22 pm
Location: VA, Roanoke
Name: James Downing
Vehicle Year: 2005
Vehicle: Chevrolet TrailBlazer
DriveTrain: 4WD w/ Aftermarket Locker
Rank: Expedition Guide

Previous

Return to Fab Work