Offroad Trailblazers and Envoys

Rebuilding roof rack with foldable solar panel

Any special projects involving a decent amount of fab work (bumpers, sliders, roof racks, etc)

by Karo » Sun Aug 12, 2012 1:53 pm

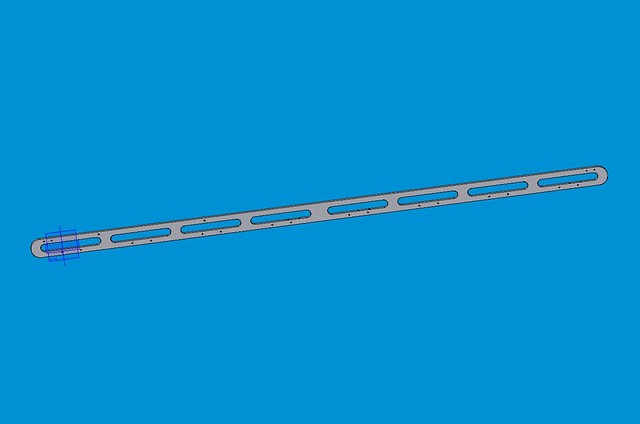
The idea was to have more energy for all the camping stuff like the Engel fridge, Notebook, TV and so on. As i have already a dual battery setup with a ctek dual 250s i would like to add a solar panel to charge the optima battery. But where to mount? Hm only place would be the roof, but i would like to have a roof tent too! So i have to redesign the roof rack. Drawings were done in Solid Edge V17 for the side rails. Here is a picture:
Image
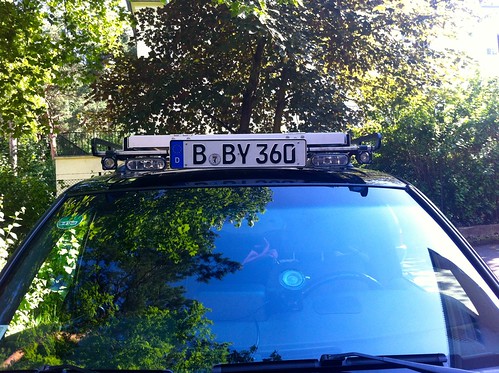
The side rails are now 210 cm long and the crossbar with the license plate and the lights on it go more in the direction to the upper edge of the windshield.
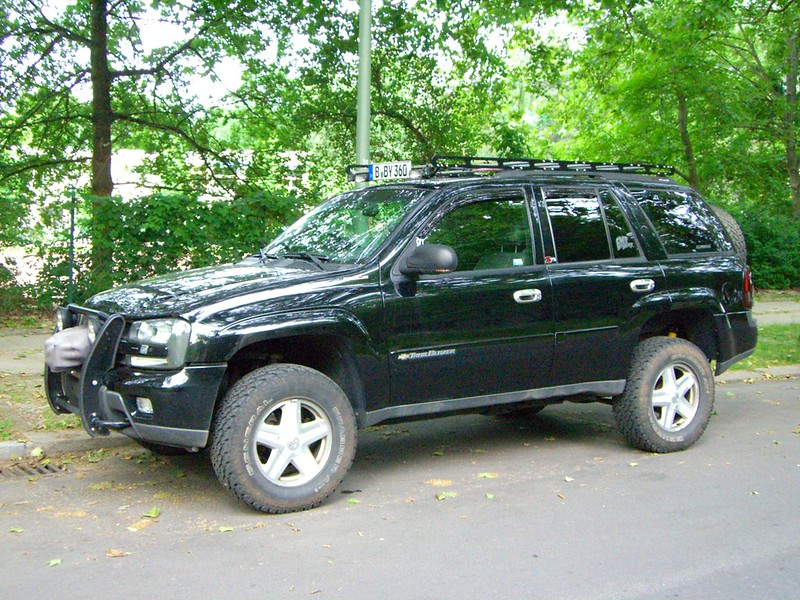
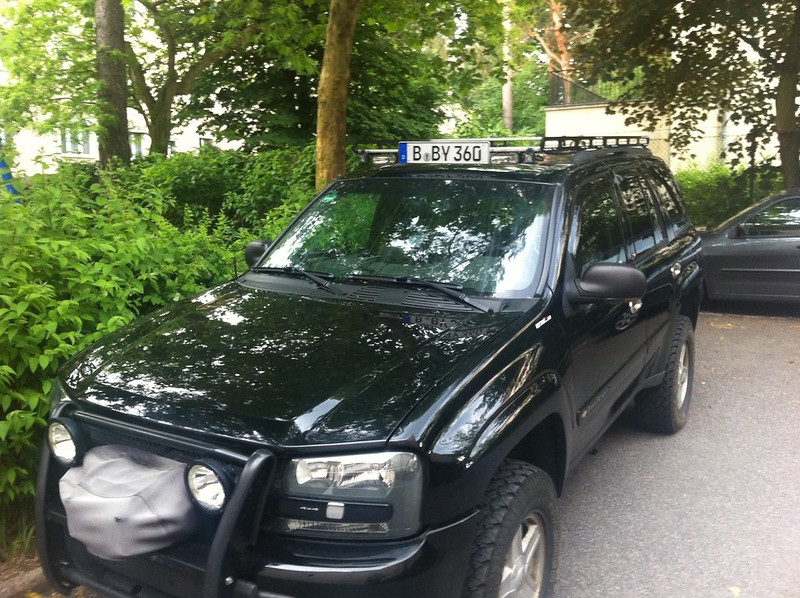
This is a older picture showing what i mean:
Image

Hopefully get the side rails done next week, they will be laser cutting them and therefore they needed a drawing made (that was the reason i have tried that in Solid Edge) :-)
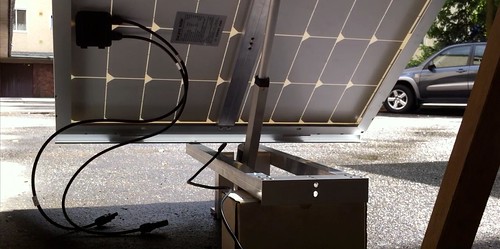
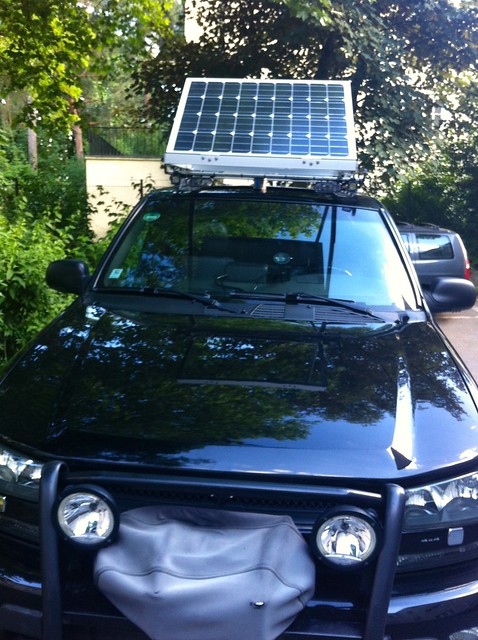
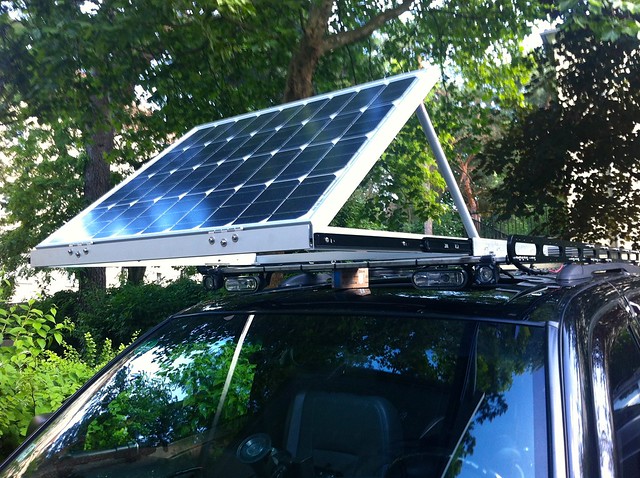
Thats the panel i want to use:
Image

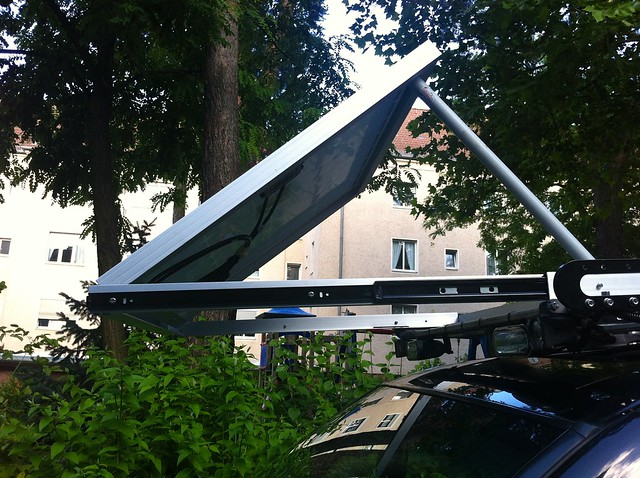
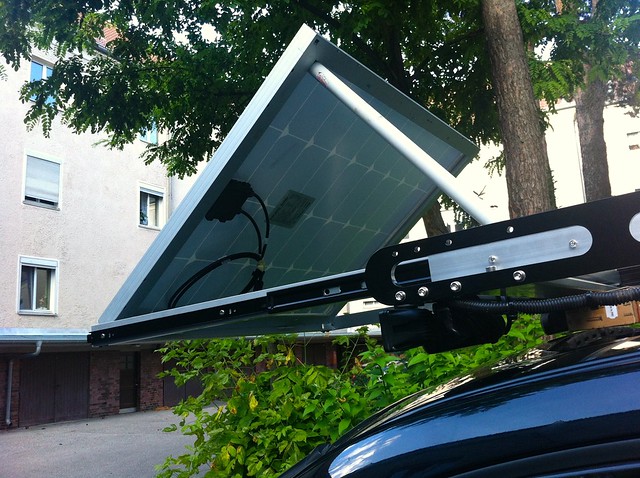
Here in the upper position:
Image

There is a redesign for the folding in my mind as in the actual version the panel with the actuator is too high (would like to make it as flat as possible).
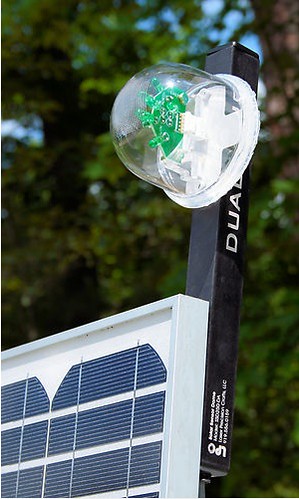
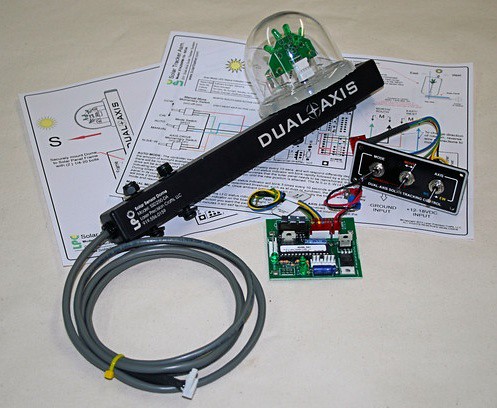
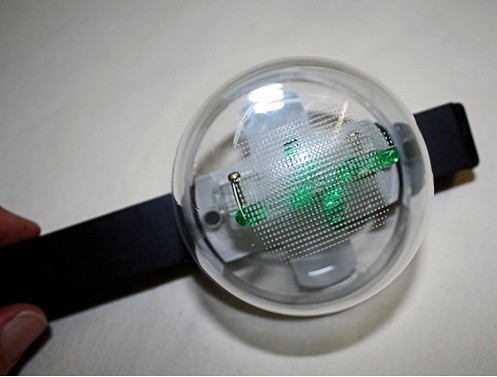
When it is ready, there is a solar tracking installed (which follows the sun when parking or camping) with these components:
Image
Image
Image

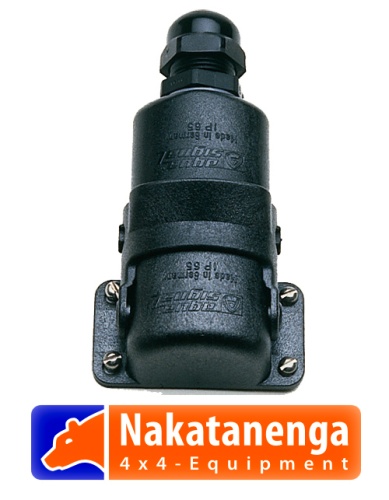
For going with all the cables trough the roof i go with this connector. It is sealed and it has 5 poles. Two of them are needed for the panel cables and the actuator cables.
Image

SO THIS IS IN PROGRESS AND NOT READY :D
User avatar
Karo
Trail-Blazer
 
Posts: 342
Joined: Fri Sep 11, 2009 3:02 am
Location: Berlin Germany 52°30'35.16"N, 13°15'31.99"E
Name: Karsten
Vehicle Year: 2002
Vehicle: Chevrolet TrailBlazer
DriveTrain: 4WD w/ G80
Rank: Trail Ready

by Trail X » Mon Aug 13, 2012 12:40 pm

Awesome plans Karsten. Really looking forward to seeing how it all comes together!
8-) Build Thread | ExPo Build | YouTube Videos
Not all who wander are lost. -Tolkien
User avatar
Trail X
Founder
 
Posts: 9925
Joined: Mon Sep 07, 2009 10:22 pm
Location: VA, Roanoke
Name: James Downing
Vehicle Year: 2005
Vehicle: Chevrolet TrailBlazer
DriveTrain: 4WD w/ Aftermarket Locker
Rank: Expedition Guide

by navigator » Mon Aug 13, 2012 3:07 pm

Karsten, you really need to move to the States!
"Please consider a search before posting. Folks on this site PIONEERED functional offroad use of these trucks."
The answer to many common lift questions can be found
here
My Build Thread
User avatar
navigator
Moderator
 
Posts: 4651
Joined: Wed Mar 09, 2011 10:16 am
Location: NC, Winnabow
Name: Chris
Vehicle Year: 2006
Vehicle: Chevrolet TrailBlazer
DriveTrain: 4WD
Rank: Trail Ready

by v7guy » Mon Aug 13, 2012 8:17 pm

That's pretty damn cool.
build thread

All things in moderation, including moderation.
Some people never go crazy... what truly horrible lives they must lead
User avatar
v7guy
Moderator
 
Posts: 3712
Joined: Wed Mar 09, 2011 10:17 pm
Location: NY, long island
Name: Jason
Vehicle Year: 2004
Vehicle: Chevrolet TrailBlazer
DriveTrain: 4WD
Rank: Offroad Rated

by Karo » Tue Aug 14, 2012 5:10 pm

navigator wrote:Karsten, you really need to move to the States!


Haha wish i could do that! :cheers:
User avatar
Karo
Trail-Blazer
 
Posts: 342
Joined: Fri Sep 11, 2009 3:02 am
Location: Berlin Germany 52°30'35.16"N, 13°15'31.99"E
Name: Karsten
Vehicle Year: 2002
Vehicle: Chevrolet TrailBlazer
DriveTrain: 4WD w/ G80
Rank: Trail Ready

by Karo » Tue Aug 14, 2012 5:12 pm

Talked to the company that will produce the side rails, laser cutting was not successful. They´ll try it with a water cutting machine.
User avatar
Karo
Trail-Blazer
 
Posts: 342
Joined: Fri Sep 11, 2009 3:02 am
Location: Berlin Germany 52°30'35.16"N, 13°15'31.99"E
Name: Karsten
Vehicle Year: 2002
Vehicle: Chevrolet TrailBlazer
DriveTrain: 4WD w/ G80
Rank: Trail Ready

by Karo » Sat Jun 15, 2013 5:20 pm

Wow time is running from from my plans a long time ago. So i had to push this a little forward, right? :cheers:
Sometimes I wish I had some helpful hands on my side , but you guys are a little too far away.. So one of my sons (he is 4 years old) had to help me :D

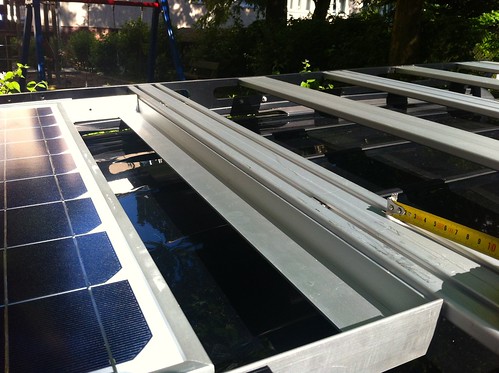
As i have posted above i found a company that has produced the side rails with a water cutting machine. After that, the side rails have been powder coated. I had to cut on each side of the crossbar bosch profiles 0.75mm and after that i had to cut some new M6 screw thread in the bosch profiles because the side rails are much stronger (thicker) now. The holder for the roof rack had to be modified too. All have been done on friday and saturday.

Before shot:
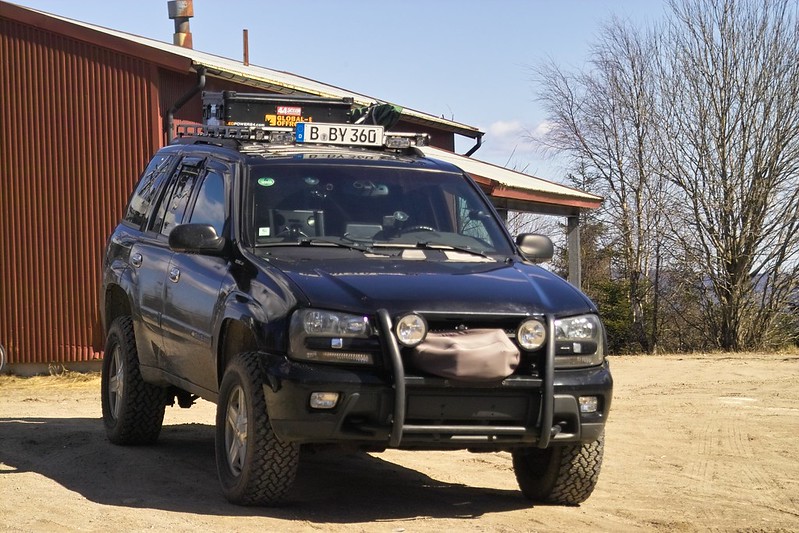
Image

and after shot:
Image

The side rails are now much longer and for the lights on top it is better to have them more towards the windshield positioned.
This are some detail shots from the passenger side front:
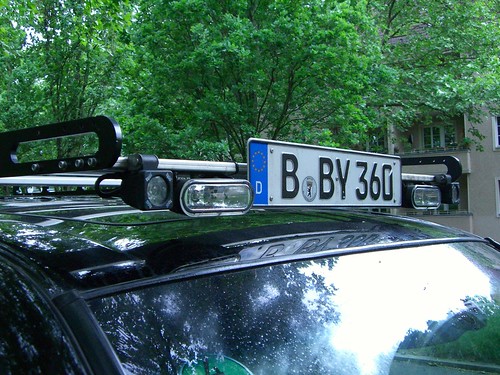
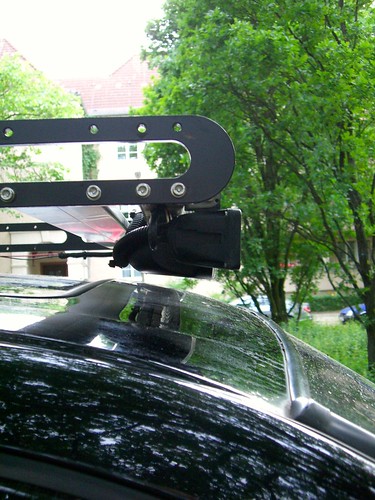
Image

Image

One of the best parts of this design is to have the window in the roof free for opening and cleaning.

I had the problem with this design in the past:

Image

Now it is completely free accessible and i could clean the gasket or climb on the roof:
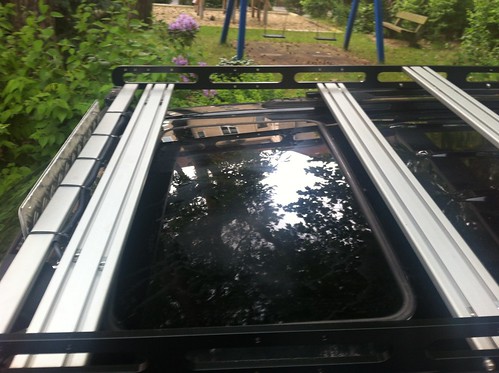
Image

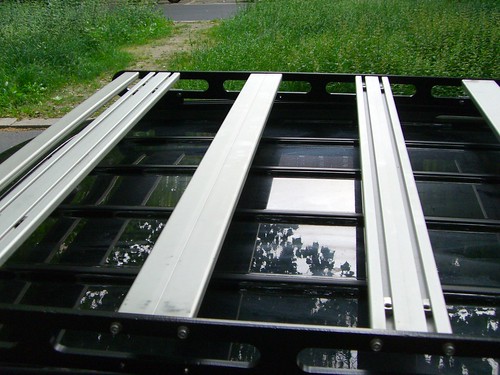
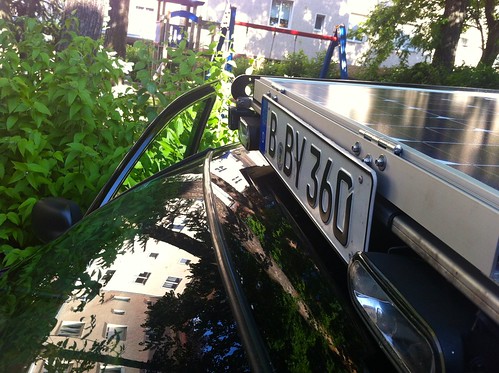
The crossbars are mounted in two different highs, for the front they are mounted lower on the side rails. This has the reason to mount the solar panel above the roof window on the crossbars on some slide rails. So when using the solar panel it slides out and stays above the windshield. Therefore the number license plate had to be mounted on the solar panel holder frame (that part comes later..). A little difficult to explain, but you could see it later. The rear part of the crossbars are mounted in the upper position and they will hold the roof top tent (that part comes later too) ;). The RTT could be mounted over the side rails to get the RTT as close to the rear cargo door. These pictures explain what i mean:

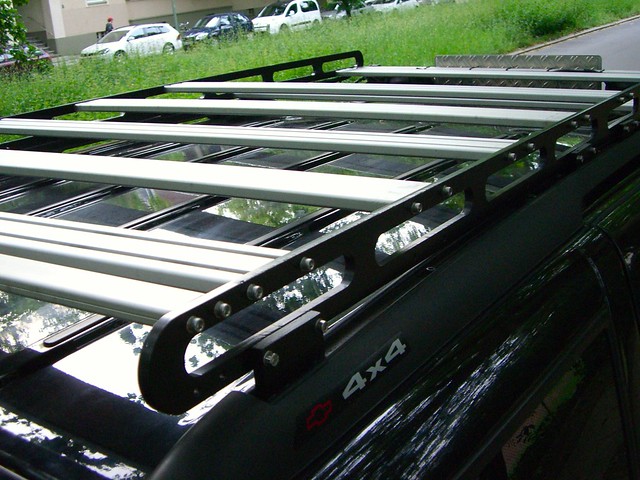
Image

Image

Image


The space left under the crossbars will be used for holding my camping table. Of course i have to remove my antenna. The reason why i have mounted the crossbars on the back upside and downside is that i could mount the holder for the camping table under the crossbars.
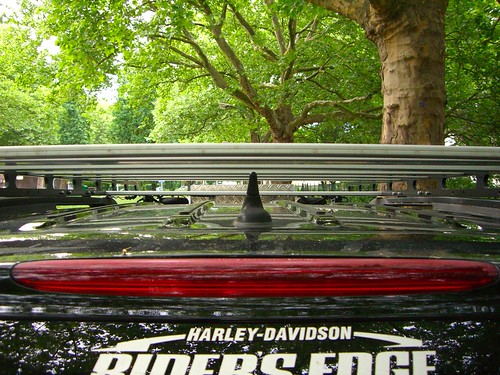
Image

Image

Image


Image

That´s all for the moment. Next steps are drilling holes to the roof for the complete electrical connections and maybe some additional holder on the front of the roof to extend the frame rail function. And after that building the frame for the solar panel holder. Any ideas how to do things better?

Karsten
User avatar
Karo
Trail-Blazer
 
Posts: 342
Joined: Fri Sep 11, 2009 3:02 am
Location: Berlin Germany 52°30'35.16"N, 13°15'31.99"E
Name: Karsten
Vehicle Year: 2002
Vehicle: Chevrolet TrailBlazer
DriveTrain: 4WD w/ G80
Rank: Trail Ready

by v7guy » Mon Jun 17, 2013 1:46 am

It looks excessively engineered to me, but I really really like it :thumright:

is the table actually going to slide on the roof of the vehicle or is it going to slide on a separate set of lower crossbars?
build thread

All things in moderation, including moderation.
Some people never go crazy... what truly horrible lives they must lead
User avatar
v7guy
Moderator
 
Posts: 3712
Joined: Wed Mar 09, 2011 10:17 pm
Location: NY, long island
Name: Jason
Vehicle Year: 2004
Vehicle: Chevrolet TrailBlazer
DriveTrain: 4WD
Rank: Offroad Rated

by Karo » Mon Jun 17, 2013 2:23 am

v7guy wrote:It looks excessively engineered to me, but I really really like it :thumright:

is the table actually going to slide on the roof of the vehicle or is it going to slide on a separate set of lower crossbars?


Thank you for your comment Jason. I have thought about the design some hours but not too many. :) My plan is to mount some c- profile rails directly under the upper crossbars. That's the reason for mounting the rear upper crossbars upside down to get acces to the slot nut for mounting the c- profile rails to them. That way I can slide the table from behind under the roof rack crossbars, there will be a gap between the table and the roof of the Trailblazer.
User avatar
Karo
Trail-Blazer
 
Posts: 342
Joined: Fri Sep 11, 2009 3:02 am
Location: Berlin Germany 52°30'35.16"N, 13°15'31.99"E
Name: Karsten
Vehicle Year: 2002
Vehicle: Chevrolet TrailBlazer
DriveTrain: 4WD w/ G80
Rank: Trail Ready

by Karo » Sat Jun 22, 2013 3:01 pm

Next step was building a solar panel frame that could be mounted to the roof carrier. The panel isn´t connected so far.

Image

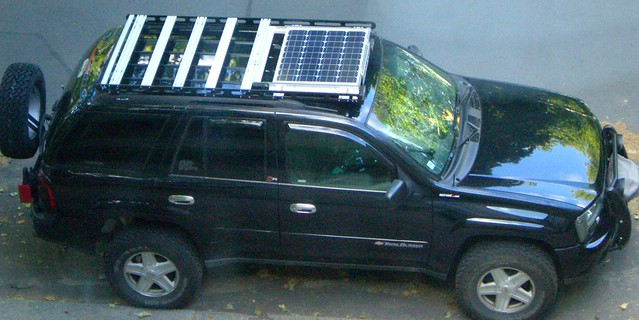
I have kept the frame and the panel as low as possible.

Image

Detail shot from the side.

Image

The rear part of the panel frame is extend to hold the tracker module and the actuator for folding the panel up and down.

Image

View from above in the closed position.

Image

Front closed shot detail view.

Image

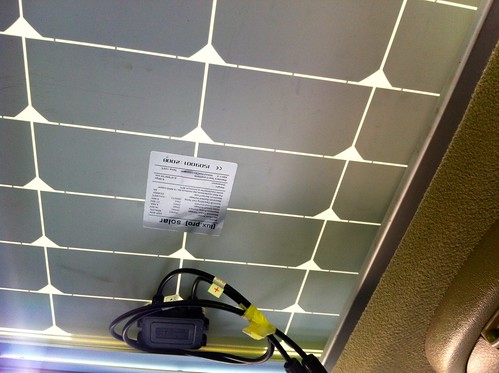
View from inside looking to the sunroof window.

Image

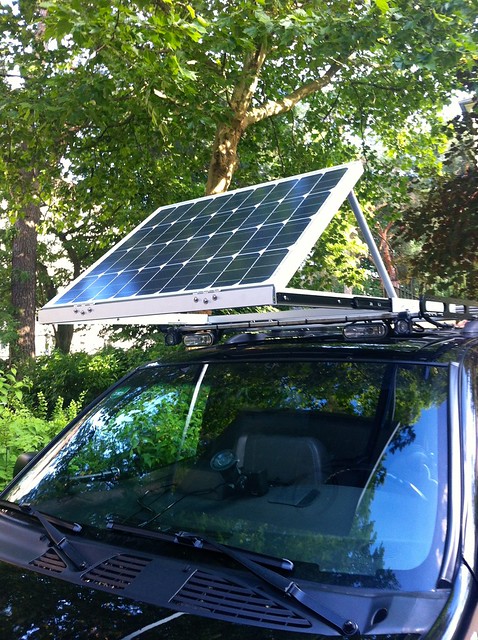
Extended position, panel is above the windshield. That way i could open the roof window and climb on the roof carrier.

Image

Side shot from the extended position.

Image

Image

Image

View from above
Image

Panel could be easily removed from the side slide out in the extended position. it has some levers to pull up and remove the last slides out.
Hope you enjoy it like me. :cheers:
User avatar
Karo
Trail-Blazer
 
Posts: 342
Joined: Fri Sep 11, 2009 3:02 am
Location: Berlin Germany 52°30'35.16"N, 13°15'31.99"E
Name: Karsten
Vehicle Year: 2002
Vehicle: Chevrolet TrailBlazer
DriveTrain: 4WD w/ G80
Rank: Trail Ready

by Trail X » Tue Jun 25, 2013 1:11 pm

The forward cantilever is quite an interesting idea. It maximizes use of the space above your sunroof, but still allows you to use it as a viewing perch if you're off on a safari of some sort.

I do worry a bit about the exposed sliding rail being exposed to the elements. Are the rails and balls stainless? I'm sure the bearing grease will get washed out pretty fast up there.

Overall very nice. Did you get the table mounting idea from Expo? I recall someone had something like that on their roof rack... I think it was one of the sierra expeditions guys - maybe?
8-) Build Thread | ExPo Build | YouTube Videos
Not all who wander are lost. -Tolkien
User avatar
Trail X
Founder
 
Posts: 9925
Joined: Mon Sep 07, 2009 10:22 pm
Location: VA, Roanoke
Name: James Downing
Vehicle Year: 2005
Vehicle: Chevrolet TrailBlazer
DriveTrain: 4WD w/ Aftermarket Locker
Rank: Expedition Guide

by Karo » Tue Jun 25, 2013 3:41 pm

James correct the rails and balls are stainless, but i think i have to clean and grease them. We will see how often that must be done. There will be another sliding rail platform on top of the solarpanel frame for holding my cargobox or maybe some kind of jerrycan like the rotopax system. The rails are in use in the trucks by the german firefighters and the german THW.
My plan is to have a flat surface for holding the cargo box, the rotopax or other stuff like this kind:

Image

Image


The idea for the front system came from this picture i had found in the web:

Image

Image

The idea for the camping table came from african outback roof carriers. They have that system, so that it is possible that that the Expo guys used it from them. Here is a picture with the african outback carrier:

Image

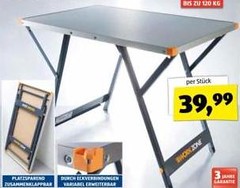
It is easy to adapt the idea to my roof carrier system, it was more difficult to find a table that can hold up to 120kg of weight, has adjustable feet and has a low packing profile.
All the stuff will look silly without the rooftent, that´s clear! But it all has to be ready and there is still so much to do for the electric. Another part is to mount some additional holders on the front part of the roof to extend the side rail holders. I´ll have to drill some more holes in the roof. :D
This will be installed for the front holders:
Image

The left one in this picture is the mounting point for some additional holders:
Image

For the moment i count 2 big holes and 4 smaller holes in the roof that have to be drilled and sealed..
User avatar
Karo
Trail-Blazer
 
Posts: 342
Joined: Fri Sep 11, 2009 3:02 am
Location: Berlin Germany 52°30'35.16"N, 13°15'31.99"E
Name: Karsten
Vehicle Year: 2002
Vehicle: Chevrolet TrailBlazer
DriveTrain: 4WD w/ G80
Rank: Trail Ready

by ChadRoss » Wed Jan 22, 2014 2:43 am

Karo wrote:The idea was to have more energy for all the camping stuff like the Engel fridge, Notebook, TV and so on. As i have already a dual battery setup with a ctek dual 250s i would like to add solar kits to charge the optima battery. But where to mount? Hm only place would be the roof, but i would like to have a roof tent too! So i have to redesign the roof rack. Drawings were done in Solid Edge V17 for the side rails. Here is a picture:
Image
The side rails are now 210 cm long and the crossbar with the license plate and the lights on it go more in the direction to the upper edge of the windshield.
This is a older picture showing what i mean:
Image

Hopefully get the side rails done next week, they will be laser cutting them and therefore they needed a drawing made (that was the reason i have tried that in Solid Edge) :-)
Thats the panel i want to use:
Image

Here in the upper position:
Image

There is a redesign for the folding in my mind as in the actual version the panel with the actuator is too high (would like to make it as flat as possible).
When it is ready, there is a solar tracking installed (which follows the sun when parking or camping) with these components:
Image
Image
Image

For going with all the cables trough the roof i go with this connector. It is sealed and it has 5 poles. Two of them are needed for the panel cables and the actuator cables.
Image

SO THIS IS IN PROGRESS AND NOT READY :D


Very nice build for sure..There is plenty to gain from the post. Were you able to complete the project? Share some more pics
ChadRoss
Newbie
 
Posts: 1
Joined: Tue Jan 21, 2014 7:07 am
Name: Brett
Vehicle Year: 2004
Vehicle: Chevrolet Trailblazer EXT
DriveTrain: 2WD w/ G80

by Karo » Fri May 23, 2014 11:35 am

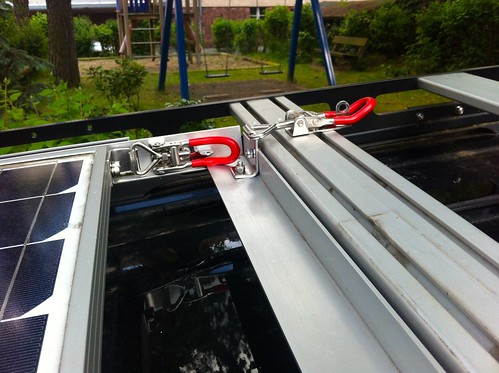
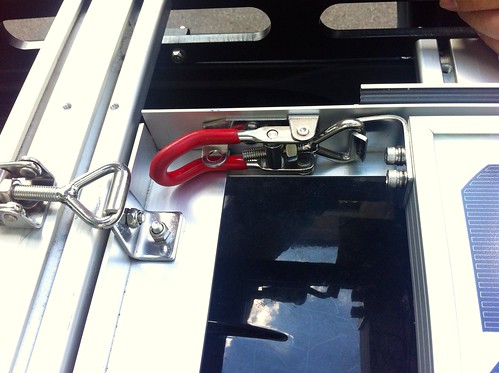
Yes had to update this thread. I have secured the solar panel with some fastener. 2 fastener for securing the panel in the horizontal position when in "drive mode". And another 2 fastener for securing the frame of the solar panel when the panel is not in the extended position. Pictures explain that better than words can do.

Image

Image

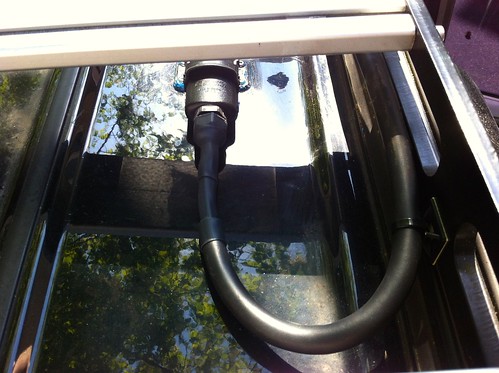
I have installed the sealed connector on the roof behind the passenger side rear door (there was enough room to get my hand between the headliner and the roof). Don´t want to destroy something from the cables or the mechanic from the roof sun glass. Drilled 5 holes for this connector. Thought that there are easier ways to get a cable to the roof, but overall needed the 5 poles. So I went this way. The connector was for applications on motorboats.

Image

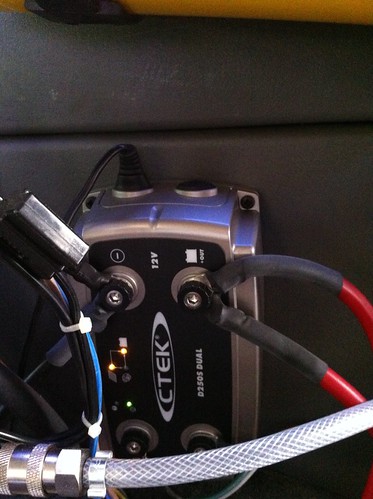
Connected on the inside to my ctek dual 250s.

Image

The leds are showing that the solar panel is connected and loading my secondary battery. So for now I´m using green electricity :-)
The panel delivers 3,6 Ampere to my setup. So the next step ist to install the actuator for the electronic folding up and down.
User avatar
Karo
Trail-Blazer
 
Posts: 342
Joined: Fri Sep 11, 2009 3:02 am
Location: Berlin Germany 52°30'35.16"N, 13°15'31.99"E
Name: Karsten
Vehicle Year: 2002
Vehicle: Chevrolet TrailBlazer
DriveTrain: 4WD w/ G80
Rank: Trail Ready

by jhmeg2 » Sat Dec 27, 2014 2:34 pm

This is fantastic. A few great projects. Great work. I look forward to the next update.
2003 LTZ-3" suspension-3"body-Massive rear upper/lower-pan hard bar-Bilstien HD struts-Skyjacker 7000 shocks-Micky Thompson 15"W/-35-12.5-15 STT-Barton front bumper, oil and radiator skids-turbo mufler-And then theres the audio
User avatar
jhmeg2
Member
 
Posts: 68
Joined: Thu Aug 16, 2012 12:55 pm
Location: Wi. Hancock
Name: Patrick
Vehicle Year: 2003
Vehicle: Chevrolet TrailBlazer
DriveTrain: 4WD w/ G80

by DennisSep » Fri Sep 13, 2024 1:26 pm

Get verified social media accounts at https://SellAccs.net. Our PVA accounts are secure, reliable, and ready to use, providing you with the tools you need to enhance your online presence. Explore our wide selection and get started today with fast, hassle-free service.

Click to Explore:

https://SellAccs.net

I Owe You One!
DennisSep
Newbie
 
Posts: 8
Joined: Wed Sep 04, 2024 1:18 pm
Name: DennisSepKH
Vehicle Year: 2005
Vehicle: Chevrolet Trailblazer EXT
DriveTrain: 2WD

by DennisSep » Tue Nov 26, 2024 11:34 pm

At https://SellAccs.net, we provide bulk verified accounts that are ready to use on any social media platform. Our PVA accounts are secure, reliable, and created using different server IPs for optimal performance. Explore our selection today and enjoy the benefits of fast delivery.

Tap Here:

https://SellAccs.net

Thank You Greatly!
DennisSep
Newbie
 
Posts: 8
Joined: Wed Sep 04, 2024 1:18 pm
Name: DennisSepKH
Vehicle Year: 2005
Vehicle: Chevrolet Trailblazer EXT
DriveTrain: 2WD


Return to Fab Work