Removal was very easy. Very carefully pry up the power window switch assembly. There's no screws holding it down, it just snaps into place. Disconnect the mirror wire harness.
In this picture the mirror connector is the third from the left:

Next, according to Chilton you need to removed the entire door panel. There are two bolts that hold the panel on the door, which you can see one when you remove the power window switch assembly and the other is hidden.
Here are the two bolts circled:

You don't need to remove the door panel though. It takes too long and you may break some of the snaps that hold the panel to the door. All you need to do is pry the corner where the mirror is located just enough to get to the bolts. Remove the foam insulation and remove the three bolts. When you're pulling the mirror off and it feels like its getting hung up on something, look inside where you removed two of the bolts and there is a small "hook" holding the mirror.
This is where the hook is:

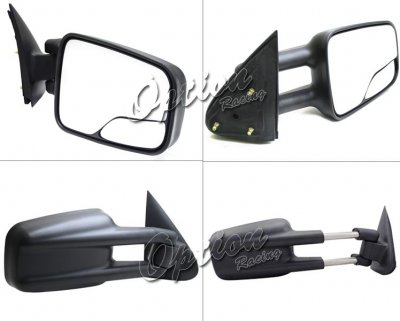
Now it's time for the fun part of wiring the new mirrors. Don't cut any wires until you have figured out exactly how you want to do it. The mirrors I bought only had about 3 inches of wire left from when the guy cut them, so it just depends on you and your new mirrors. That being said I also don't know what type of mirrors you're getting and what style of plug they have, that's what makes this so fun isn't it.
I've looked and looked, even went to a Chevy dealer and with no luck I was unable to find a wiring diagram of our TB mirrors. So I had to do it the hard way. While I was on an offroading trip I lost traction and slid into a tree and somewhat crushed my passenger mirror. It still worked but the plastic was cracked and the cover had fallen off, so what I did was I cut it open for all of you too see.
Here's what's left:

Here are the important parts. Just an FYI, my TB is a 2002 EXT so you may not have all the options mine does. The mirror(those two prongs on the mirror are for the heated mirrors only), the mirror housing along with the mirror adjusting motor, and what I'm holding is what the the mirror mounts onto and allows the motor to adjust the mirror angle.

This is the back of the motor. If you were to take off your own mirror glass you would have to remove the motor in order to get to these wires.

The insides of the motor. When this is in the housing it's not laying up and down like in the picture, it's turned about 45 degrees. Inside there are two electric motors, one gear per motor, and above the motors is a Printed circuit board. The PCB is for the memory mirrors.

Here's a picture showing how the mirror attachment fits in the motor housing.

This is what the mirror physically attaches to. The two straight legs are actually plastic screws. When you want to adjust your mirror up/down/left/right the motor spins the gear, making the leg screw up and down. The other two square looking legs are for the PCB board/memory feature.

Just to give a better idea of what I'm talking about, you can see how it fits together.

Here are all the wires that you'd find inside the mirror housing. From left to right you have, PCB connector for memory mirrors, electric motor connector, turn signal connector, and the two black wires are heated mirror connectors.

The mirror connector has two rows, labeled A and B, and eight rows, labeled 1 through 8.

I made this diagram according to the row and column labels found on the connector. To figure out what wires did what it was just a process of elimination and testing with a voltmeter. Here is what I found

You'll notice that there is only one red wire on the connector but there are two red wires that connect to the electric motors. Thats because inside the mirror housing the wire splits into two.
I was unable to find a wiring diagram for my new silverado mirrors so I just had to guess and try things out. I could tilt the mirror glass to look behind and see which wires went where so that helped. Easiest thing for you to do is find a diagram for your mirror. If you can't find one you'll just have to try things out and see what it does. The mirrors I bought the driver mirror was wired slightly different than the passenger mirror. Here's what I found and yes it works, and for the driver side because the stock connector only has one red wire(the up/down/left/right (-)), I connected the two yellow together.

One problem I faced and you will face too is that the bolt holes to attach your new mirror wont match up. This is my new mirror and I layed my stock backing foam on it to see where the holes lined up. Two are very close but one is off about an inch.

To figure out where i needed to drill a hole I placed the backing foam from my new mirror where it would mount like this picture. And yes I know the foam in the picture is from my stock mirrors, I forgot to take a picture when I did that.

Another problem I encountered was where I needed to drill the hole. It's hard to explain exactly what I mean so I'll just show you.

The bolt will be too close to the door frame that I wouldn't be able to install the nut. To get around this I cut a little of the frame.

I also filed the top bolt hole a little so I could rotate the mirror to fit the lines of the vehicle, that way it looked stock. Now that it was time to install my new mirror I had a decision to make; to use the new mirrors backing foam or use the stock foam. Here's why I had to decide:

There's a gap and it doesn't look appealing.

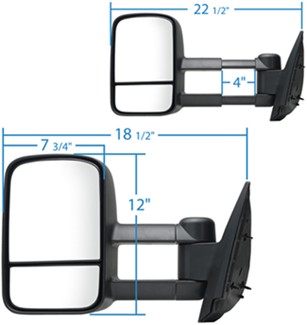
After all the hard work I'm very pleased with the final result. I love the bigger mirrors and have full functionality, plus if you didn't know any better you'd think they were stock.


Here's a comparison of what stock view looks like vs new view:


Hope you like the mod. It's actually very easy. I did the hard part of figuring out the wiring, now all you need to do is re-wire and figure the mounting. Happy modding.


 .
.
